Installation
A quick step by step guide to upgrading the memory on a Lenovo ThinkPad Edge E320 laptop. First step is to completely shutdown the laptop, flip it over upside down and remove the battery. Next remove the access panel from the bottom of the laptop. It's held in place by three screws.
Remove the three screws and the lift the large access panel off.
The laptop has two memory slots and ships with one 4 GB memory module installed.
We'll install another 4 GB module to give us a total of 8 GB of memory. The extra module will also mean that the laptop will go from a single to dual channel memory configuration which should give us a nice performance boost. The memory module I installed was a Kingston KTL-TP3B/4G.
The new memory module fits into the top most slot. Slide the module into the slot and then apply gentle downward pressure until the top and bottom metal clips engage to hold the module in place.
Replace the access panel, securing it back in place with the three screws. Re-install the battery and reboot.
Performance
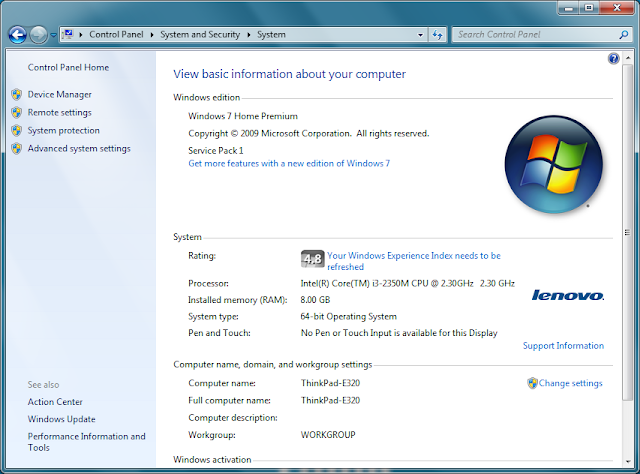
Once the computer has rebooted, bring up the system properties dialog. This will indicate that you now have 8 GB of installed memory and that the Windows Experience Index needs to be updated.

"Refresh Now" will refresh the Memory (RAM) subscore
The Memory subscore increases from 5.9 to 7.3
If you "Re-run the assessment" you'll also see a boost to the Graphics subscores since the integrated graphics controller in this laptop uses the same (faster) memory.


